After receiving feedback from our tutor I decided to swap some of the shots around thus differing our narrative slightly. In the original version we first introduced the female character in flashback and then jumped forward to our main protagonist sulking in grief, however we now introduce him first and the girl at around 1 minute. I believe that this allows the audience to understand the storyline more effectively as they can see the despondency of the main character and know that he has lost his 'love.' As well as that I was concerned about our allegro instrumental sections due to the fact that at first we simply had shots of the characters observing ducks in the pond. Therefore I moved the 'duck' shots to take place as part of the scene setting and had the instrumental sections contain Emily running (to demonstrate the upbeat music).
Also I decided that the opening forty seconds felt a touch slow so I experimented with the addition of 'titles' and found that this worked fairly well and the band had also used titles in some of their own pop promos. Most importantly I added the super-8mm film effects by using in built functions on Final Cut Pro including 'bad film' and 'colour balance' to all the shots where the 'girl' was in shot.
Tuesday, 16 March 2010
Other group DIGI Pack Ideas
This is Emily's design for a cartoon based DIGI Pack which would in many ways reflect the offbeat quirky nature of the band as well as standing out from most other covers you find in the market. The downside would be that it may a look a bit childish which could alienate our young adult demographic.


 These two designs were created by Chris using his home laptop. As you can see they experiment with different fonts as well as seeing debating whether a mid two shot is better than two separate close ups.


 These two designs were created by Chris using his home laptop. As you can see they experiment with different fonts as well as seeing debating whether a mid two shot is better than two separate close ups.
This simple design was a communal effort and despite the image being quite plain it is an image we think sums up the story line of our pop promo very well. Although more details will have to be included on the final front cover.
These final two designs were created by hand by Vhris and then scanned onto blogger. They are my favourite images but I beleive that they would need some fine tuning and organisation in order to allow them to be the final covers.


Friday, 8 January 2010
Individual DIGI PACK Ideas


I am the first to admit that I am rubbish at art and I realise that my efforts at fonts look kitch to be polite and nasty to be honest. I think however that my still shots could used somewhere, if only on the inside cover, as they aere well lit and create interestingly shaped pathways and contours which could be used as a metaphor for the passage of time our pop promo will go through.
Editing
Over the course of two lessons I logged all of the footage we collected from our three filming sessions in order to begin to cut it together. Following that I cut together the shots to form our desired narrative. I quickly realised that some of our shots lasted too long (7 or 8 seconds) and that they were not in keeping with the traditional quick paced cuts of pop promos. However we didn't want to lose great swathes of the footage we liked so I broke up the longer takes into two or even three sections and placed other shots, as well as dissolve cuts in some cases, into them. I was mostly pleased with the results as we got as it enabled us to see our main character's physical journey and therefore his enveloping sadness over loss of his partner.
Mostly I employed conventional edits in order to establish a narrative based video but when we switched either timeframes or locations I decided that it would be appropriate to use more unothodox edits that were often symbol based as this drew the attention of the audience so that they were fully aware of the change. I also decided to use our extensive footage of animal life in the instrumental chorus as these were our shots with the highest degree of quick movements but after several views I have become unconvinced by this and am considering putting in recaps of the couple's exploits instead and using the animal footage more as way of establishing location during the less allegro like section of both verses. I think it's important now to cut rapidly between both time frames during the chorus in order to show the stark contrast of the main character's feelings from one period to the next.
After studying our first edit I am fairly pleased with the footage of our main character looking despondent as well as most of the shots showing the couple's jovial times. However I am still slightly concerned by how we are linking them together and making best use of the juxtapositional nature of our video, i.e the upbeat song with the end of a relationship. It is alos important to note that as of yet we have not finalised the method which we will use to make the flashbacks look like Super 8mm film footage which I believe will be vital in establishing contrast.
The following log was created by Chris Kenworthy and I have modified the personal pronouns to refer to myself.
Log, Capture and First Edit
Today we managed to sort out the problem we had last Friday with logging and capturing our footage. There was one minor hiccup, where we started to record instead of playback our footage, but we only lost a couple of seconds of footage which wasn't that important anyway.
After logging and capturing the footage, I started to piece together all the shots in a timeline in Final Cut Pro, whilst Chris continued his research into the aged-film "Super 8mm" Film Effect using both the internet and Final Cut Pro to experiment with different effects. Emily, meanwhile, continued to develop her own individual ideas for the Digipack (CD Cover) and Poster.

Chris exported the first edit from Final Cut Pro into a ".mov" file. The cuts and transitions are not yet perfect, as this is like a first draft of the project so far. Therefore, don't expect to see perfection. He then uploaded the file to his YouTube Channel, and will soon upload it here once he has compressed the file to a smaller size.
The photographs above are screenshots Chris made of the handheld shot which rotates 360 degrees in a circle - we used this shot in our editing.
Research into the Super 8mm Effect for use with Final Cut Pro
Although Chris is not Chief Editor, and I am, he might be working in cooperation with me as the Co-Editor. Therefore he has kindly devoted himself into finding some research into the "Super 8mm" Effect we had discussed about in Group Production Meetings and agreed to use if possible for the flashback elements of our Music Promotional Video for "5 Years Time" by Noah and the Whale. He found the information below on: http://forums.creativecow.net/thread/8/918311, when someone had posted on this forum "Can anyone suggest the best way to emulate a super 8 or an aged film look in final cut pro?":
There are many plug-ins (Nattress is one) that simulate the effect. But if you want something cheap and free. Export the clip out of FCP using "Quicktime Conversion" Then, under Option-Filter-Special Effects, you can add some a film hair/dirt effect that's not too bad. Combine that with color correction in FCP and possibly some speed adjustment (Old 8mm always seems sped-up a bit) it might just work for free. Ernie Santella Santella Film/Video Productions
http://www.santellaproductions.com/.
Chris also found the following useful information on this website:
http://www.nattress.com/Solutions/solutions.htm#6:
I want to make my video look like film: The Film Effects package was designed for you! Whether you are using PAL, NTSC, or HDV (or HD or SD) Film Effects has settings which will make your video look much more filmic. Film Effects does 25p conversion for PAL frame rates and 24p conversion (with 3:2 pulldown added) for NTSC frame rates. It has over 20 presets and you can make your own. There are over 27 plugins, all designed for different aspects of making your video look filmic and can be used in combinations or separately. Film Effects also gives you immense control over the gamma and tone of your image, so it can be a great tool even when you're not trying to make your video look like film.
I want to make my video look like old Super-8 film: Film Effects has a preset called "Old Projector". This might be exactly what you're looking for, or you can use it as a starting point.
Chris found the following useful advice on: http://library.creativecow.net/articles/smith_stephen/film_look.php (ALL CREDIT TO THIS WEBSITE AND THANKS FOR THE ADVICE!! WE WILL CONSIDER THESE IDEAS AND HOPEFULLY THE RESULT WILL BE AS PLANNED!!)
1. Black & White or Sepia
Black & White
Select the desired clip in the time line.
Choose Effects > Video Filters > Color Correction > Color Corrector 3-Way.
Double click on your clip and then select the Color Corrector 3-way tab in the viewer. Drag the Sat (Saturation) slider tab to the far left.
Drag the Whites slider to the right and the Blacks slider to the left slightly, this will add more contrast to your clip and make it feel more dimensional.
Sepia
Select the desired clip in the time line.
Choose Effects > Video Filters > Image Control > Sepia.
Double click on your clip and then select the Filters tab in the viewer.
Change the highlight amount to give the clip a more realistic sepia color. I find 33 works well for a lot of clips but it does vary.
Click on the triangle in the Tint Color box and then adjust the S slider to give your clip a more faded look. I find 58 works well in a lot of situations.
2. Export Clip
This is where you get to add all of the visual effects that are associated with old or damaged film.
Mark in and out points on the timeline of the clip or clips you wish to give that old film look to.
Choose File > Export > Using Quick Time Conversion.
Give the clip a name, locate where you would like to place it and select what format would work best.
Click the Options button. In the video settings section select the Filter button.
Click on the triangle next to the text Special Effects. Then select Film Noise.
Click on the Hairs button and change it to Scratches. Set Scratch Density to 0.
Adjust the Dust and Film Fading > Film Fading setting to None.
Change the Hairs settings and the Dust and Film Fading settings to your liking. I adjusted the Hairs > Hair Density to 48, while I bumped the Hair > Hair Length to 47.
Click Ok and then click Ok again in the Movie Settings box. Then click on the Save button.
When the clip is done exporting your in and out points remain on the timeline. Repeat steps A through D and then change the Scratches > Scratch Density from zero to around 6. Don’t worry about the scratches looking fake, that will be remedied in the next section.
Click Ok and then click Ok again in the Movie Settings box. Then click on the Save button.
3. Double Clips up
This section will take the edge off of the fake looking scratches.
Import the two clips and drag them into the timeline.
Place the clip with the scratches on top of the clip with out.
Drop the opacity of the top clip to about 30 percent.
4. Ad Flicker
This step adds that extra touch of believability to that old film look.
In the Viewer click on the A in the film strip.
In the drop down menu drag the mouse to the word Matte. Then click on the word Color from the menu that pops out of the side.
In the Viewer select the Controls tab and then click on the gray box.
Change the color to black and hit OK.
Select the Video tab and then drag the matte to the track above your two clips in the Timeline.
Click on the Clip Overlays button on the Timeline and lower the clips’ opacity to 17.
Select the pen tool from the Tool Pallet.
Add a keyframe to every four frames of the matte. Then drag every other keyframe to zero opacity.
Mostly I employed conventional edits in order to establish a narrative based video but when we switched either timeframes or locations I decided that it would be appropriate to use more unothodox edits that were often symbol based as this drew the attention of the audience so that they were fully aware of the change. I also decided to use our extensive footage of animal life in the instrumental chorus as these were our shots with the highest degree of quick movements but after several views I have become unconvinced by this and am considering putting in recaps of the couple's exploits instead and using the animal footage more as way of establishing location during the less allegro like section of both verses. I think it's important now to cut rapidly between both time frames during the chorus in order to show the stark contrast of the main character's feelings from one period to the next.
After studying our first edit I am fairly pleased with the footage of our main character looking despondent as well as most of the shots showing the couple's jovial times. However I am still slightly concerned by how we are linking them together and making best use of the juxtapositional nature of our video, i.e the upbeat song with the end of a relationship. It is alos important to note that as of yet we have not finalised the method which we will use to make the flashbacks look like Super 8mm film footage which I believe will be vital in establishing contrast.
The following log was created by Chris Kenworthy and I have modified the personal pronouns to refer to myself.
Log, Capture and First Edit
Today we managed to sort out the problem we had last Friday with logging and capturing our footage. There was one minor hiccup, where we started to record instead of playback our footage, but we only lost a couple of seconds of footage which wasn't that important anyway.
After logging and capturing the footage, I started to piece together all the shots in a timeline in Final Cut Pro, whilst Chris continued his research into the aged-film "Super 8mm" Film Effect using both the internet and Final Cut Pro to experiment with different effects. Emily, meanwhile, continued to develop her own individual ideas for the Digipack (CD Cover) and Poster.
Chris exported the first edit from Final Cut Pro into a ".mov" file. The cuts and transitions are not yet perfect, as this is like a first draft of the project so far. Therefore, don't expect to see perfection. He then uploaded the file to his
YouTube Channel, and will soon upload it here once he has compressed the file to a smaller size.The photographs above are screenshots Chris made of the handheld shot which rotates 360 degrees in a circle - we used this shot in our editing.
Research into the Super 8mm Effect for use with Final Cut Pro
Although Chris is not Chief Editor, and I am, he might be working in cooperation with me as the Co-Editor. Therefore he has kindly devoted himself into finding some research into the "Super 8mm" Effect we had discussed about in Group Production Meetings and agreed to use if possible for the flashback elements of our Music Promotional Video for "5 Years Time" by Noah and the Whale. He found the information below on: http://forums.creativecow.net/thread/8/918311, when someone had posted on this forum "Can anyone suggest the best way to emulate a super 8 or an aged film look in final cut pro?":
There are many plug-ins (Nattress is one) that simulate the effect. But if you want something cheap and free. Export the clip out of FCP using "Quicktime Conversion" Then, under Option-Filter-Special Effects, you can add some a film hair/dirt effect that's not too bad. Combine that with color correction in FCP and possibly some speed adjustment (Old 8mm always seems sped-up a bit) it might just work for free. Ernie Santella Santella Film/Video Productions
http://www.santellaproductions.com/.
Chris also found the following useful information on this website:
http://www.nattress.com/Solutions/solutions.htm#6:
I want to make my video look like film: The Film Effects package was designed for you! Whether you are using PAL, NTSC, or HDV (or HD or SD) Film Effects has settings which will make your video look much more filmic. Film Effects does 25p conversion for PAL frame rates and 24p conversion (with 3:2 pulldown added) for NTSC frame rates. It has over 20 presets and you can make your own. There are over 27 plugins, all designed for different aspects of making your video look filmic and can be used in combinations or separately. Film Effects also gives you immense control over the gamma and tone of your image, so it can be a great tool even when you're not trying to make your video look like film.
I want to make my video look like old Super-8 film: Film Effects has a preset called "Old Projector". This might be exactly what you're looking for, or you can use it as a starting point.
Chris found the following useful advice on: http://library.creativecow.net/articles/smith_stephen/film_look.php (ALL CREDIT TO THIS WEBSITE AND THANKS FOR THE ADVICE!! WE WILL CONSIDER THESE IDEAS AND HOPEFULLY THE RESULT WILL BE AS PLANNED!!)
1. Black & White or Sepia
Black & White
Select the desired clip in the time line.
Choose Effects > Video Filters > Color Correction > Color Corrector 3-Way.
Double click on your clip and then select the Color Corrector 3-way tab in the viewer. Drag the Sat (Saturation) slider tab to the far left.
Drag the Whites slider to the right and the Blacks slider to the left slightly, this will add more contrast to your clip and make it feel more dimensional.
Sepia
Select the desired clip in the time line.
Choose Effects > Video Filters > Image Control > Sepia.
Double click on your clip and then select the Filters tab in the viewer.
Change the highlight amount to give the clip a more realistic sepia color. I find 33 works well for a lot of clips but it does vary.
Click on the triangle in the Tint Color box and then adjust the S slider to give your clip a more faded look. I find 58 works well in a lot of situations.
2. Export Clip
This is where you get to add all of the visual effects that are associated with old or damaged film.
Mark in and out points on the timeline of the clip or clips you wish to give that old film look to.
Choose File > Export > Using Quick Time Conversion.
Give the clip a name, locate where you would like to place it and select what format would work best.
Click the Options button. In the video settings section select the Filter button.
Click on the triangle next to the text Special Effects. Then select Film Noise.
Click on the Hairs button and change it to Scratches. Set Scratch Density to 0.
Adjust the Dust and Film Fading > Film Fading setting to None.
Change the Hairs settings and the Dust and Film Fading settings to your liking. I adjusted the Hairs > Hair Density to 48, while I bumped the Hair > Hair Length to 47.
Click Ok and then click Ok again in the Movie Settings box. Then click on the Save button.
When the clip is done exporting your in and out points remain on the timeline. Repeat steps A through D and then change the Scratches > Scratch Density from zero to around 6. Don’t worry about the scratches looking fake, that will be remedied in the next section.
Click Ok and then click Ok again in the Movie Settings box. Then click on the Save button.
3. Double Clips up
This section will take the edge off of the fake looking scratches.
Import the two clips and drag them into the timeline.
Place the clip with the scratches on top of the clip with out.
Drop the opacity of the top clip to about 30 percent.
4. Ad Flicker
This step adds that extra touch of believability to that old film look.
In the Viewer click on the A in the film strip.
In the drop down menu drag the mouse to the word Matte. Then click on the word Color from the menu that pops out of the side.
In the Viewer select the Controls tab and then click on the gray box.
Change the color to black and hit OK.
Select the Video tab and then drag the matte to the track above your two clips in the Timeline.
Click on the Clip Overlays button on the Timeline and lower the clips’ opacity to 17.
Select the pen tool from the Tool Pallet.
Add a keyframe to every four frames of the matte. Then drag every other keyframe to zero opacity.
Filming

In the last week of the Christmas term we filmed in two locations, Christchurch Park and the Ipswich Waterfront. We gathered all of the shots we were scheduled to get on those days but unfortunately on the friday when we were due to complete our filming heavy snow and staff absence prevented us from doing so. However we are endeavouring to work out an afternoon or two when we complete our filming. For the time being further heavy snowfall has made filming in our locations impossible so we are for the moment spending our time updating our blog and beginning to log, capture and edit our existing footage.

During the filming we have managed to execute we have been keen to produce a variety of camera shots and angles which serve to add both texture and characterisation to our video. For example we have played around with focus in some of our shots so that our main character (Chris K) is at first out of focus and then comes into it as the camera comes across him. We hope that this technique will produce the effect of portraying the character as someone who is not quite in tune with the world because he is in mourning. As well as that we have used several tracking and panning shots to show the character's journey, moreover his meandering struggle with his own existence.
Disruption
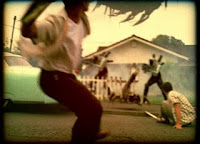
After this successful shoot we were forced to wait until after the Christmas break to complete our filming, however there then followed several weeks of snow and bitter weather rendering our filming capability obselete. As a result we were forced to fit our filming into the first available friday morning but this meant that our 'actress' Emily Halls was unable to film so our own group member Emily Swager kindly consented to play the 'girl.' We shot for around ninety minutes at Christchurch Park, filming her 'playing up to the camera' as if the main protagonist was holding it and deliberately making the camerawork slightly shaky and amateurish knowing that we would be adding effects to make the footage look like old super-8mm film. We also filmed some shots with both Chris and Emily in frame so as to provide a link between them in terms of relationship for the audience.
Additionally we went on to film by Ipswich Waterfront, employing many of the same handheld techniques as we 'followed' Emily along the quay side. We filmed here for around ninety minutes again and were satisfied that we had garnered all of the footage we needed.

Thursday, 10 December 2009
I asked a questionnaire to seven students in my class, who are aged between 17 to 19 and I asked the following questions:
1.Have you ever heard of Noah and The Whale?
2.What type of music do you like to listen to?
3.Which do you like better a pop promo with a Narrative or performance?
4.Do you like music with Lyrics or without Lyrics?
5.Would you watch the pop promo of a song even if you didn’t like the song?
From the first question the results were interesting as a lot of people have heard of Noah and the Whale, out of the seven six people have heard of them. This is good in a way because it means that these students have an idea of what type of genre Noah and the whale play, but at the same time it’s bad as these students can compare our pop promo with the original pop promo’s of Noah and the Whale.

There were a various different types of genre for music, but the main types of genres were: Metal, Rock, R&B, Hip Hop, Pop, Trance, and Classical. A lot of these students prefer many different types of genres rather than sticking to one type. There is a joint top of genre of music, which is: Metal, Rock, RnB, and Hip-Hop, pop. This is bad for our group as the genre of music that Noah and the Whale like to perform is indie type music, which the students have not even included in their favorite types of music.
Our group asked this number three because for our pop promo it is just a narrative and we are interested in what people are more interested in performance or narrative. The result of this question came out equal (five each) which is interesting because a lot of the students chosen both. But this is good for our group, as we now know that it is not that important to have any performance and no one will be disappointed.
Our group asked the question four because some people in our class are actually doing a pop
promo without any lyrics and our group were wondering what these group of students actually prefer to listen to. This questions goes with what type of music people like to listen to all of those genre’s of music that they choose have lyrics in them normally apart from trance. This is good for our group as we have lyrics in ours also lyrics are good for a pop promo as it gives a narrative which we can follow rather than a pop promo without lyrics because then the pop promo has to go to the beat of the music rather than the lyrics.
The last question we asked because we want to know if any would actually be interested in looking up Noah and the Whale but the results of this showed that people prefer to watch a pop promo if they like the song, people who don’t mind watching a pop promo if they didn’t like the song only said that they would watch the pop promo for research. I think that this is a true point as if you like a song a lot most people want to see how the band have managed to create it on screen.
From our research of this questionnaire I can say that our group is on the right path of knowing how to capture this audience, but at the same time are really down side is that no one in our class enjoys indie, which might put our fellow students off our pop promo.
1.Have you ever heard of Noah and The Whale?
2.What type of music do you like to listen to?
3.Which do you like better a pop promo with a Narrative or performance?
4.Do you like music with Lyrics or without Lyrics?
5.Would you watch the pop promo of a song even if you didn’t like the song?
From the first question the results were interesting as a lot of people have heard of Noah and the Whale, out of the seven six people have heard of them. This is good in a way because it means that these students have an idea of what type of genre Noah and the whale play, but at the same time it’s bad as these students can compare our pop promo with the original pop promo’s of Noah and the Whale.
There were a various different types of genre for music, but the main types of genres were: Metal, Rock, R&B, Hip Hop, Pop, Trance, and Classical. A lot of these students prefer many different types of genres rather than sticking to one type. There is a joint top of genre of music, which is: Metal, Rock, RnB, and Hip-Hop, pop. This is bad for our group as the genre of music that Noah and the Whale like to perform is indie type music, which the students have not even included in their favorite types of music.
Our group asked this number three because for our pop promo it is just a narrative and we are interested in what people are more interested in performance or narrative. The result of this question came out equal (five each) which is interesting because a lot of the students chosen both. But this is good for our group, as we now know that it is not that important to have any performance and no one will be disappointed.
Our group asked the question four because some people in our class are actually doing a pop
promo without any lyrics and our group were wondering what these group of students actually prefer to listen to. This questions goes with what type of music people like to listen to all of those genre’s of music that they choose have lyrics in them normally apart from trance. This is good for our group as we have lyrics in ours also lyrics are good for a pop promo as it gives a narrative which we can follow rather than a pop promo without lyrics because then the pop promo has to go to the beat of the music rather than the lyrics.
The last question we asked because we want to know if any would actually be interested in looking up Noah and the Whale but the results of this showed that people prefer to watch a pop promo if they like the song, people who don’t mind watching a pop promo if they didn’t like the song only said that they would watch the pop promo for research. I think that this is a true point as if you like a song a lot most people want to see how the band have managed to create it on screen.
From our research of this questionnaire I can say that our group is on the right path of knowing how to capture this audience, but at the same time are really down side is that no one in our class enjoys indie, which might put our fellow students off our pop promo.
Friday, 4 December 2009
Bands similar to Noah and the Whale
 Mumford and Sons
Mumford and Sons are a folk/blugrass band who have received positive critical acclaim from national newspapers such as the Guardian who featured them on their 'Band of the Day' online forum. They originated in London's pub folk scene (Twickenham in fact which is where Noah and the Whale originated) and have garnered a strong cult following amongst this crowd. In fact two of their band members even when to the same school as Noah and the Whale's bass player.
They released their debut album Lend Me Your Eyes in July 2008 and its lead single Roll Away Your Stone was featured as Radio 2's single of the week. They are attached to the label Chess Club which released their second album in November. In addition they made a successful appearance at the Cambridge Folk Festival where they wooed audiences with their country-tinged acoustic anthems mainly featuring banjos and double bass. The band pride themselves on their lyrical sensibilities about love, loss and despair. They also dabble in socio-political messages which is a nod to the decades of work by Bob Dylan. Finally, the band features as one of its singers, Laura Marling who has sung with Noah and the Whale.
They finished a nationwide tour in 2008 with support from Peggy Sue, Pete Roe, The Cutaway and more. They are now touring with the Maccabees and have been longlisted for the BBCs Sound of 2009. As well as that they have received airtime and support from Radio 1 DJs Zane Lowe and Greg James as well as XFMs Dave Berry. Mumford & Sons won Best Band at the 3rd Annual BalconyTV Music Video Awards in Dublin on 3 July 2009. In addition they now have a specially designated playlist folder On Virgin TV On Demand along with the likes of the Rolling Stones and Lady Gaga which goes to the show that they have broken into mainstream culture.
Some of their songs include:
Little Lion Man
Winter Winds
White Blank Page
Feel The Tide
The Cave
Subscribe to:
Posts (Atom)